WhatsApp
- Taoist Treasures
- 2025-01-12
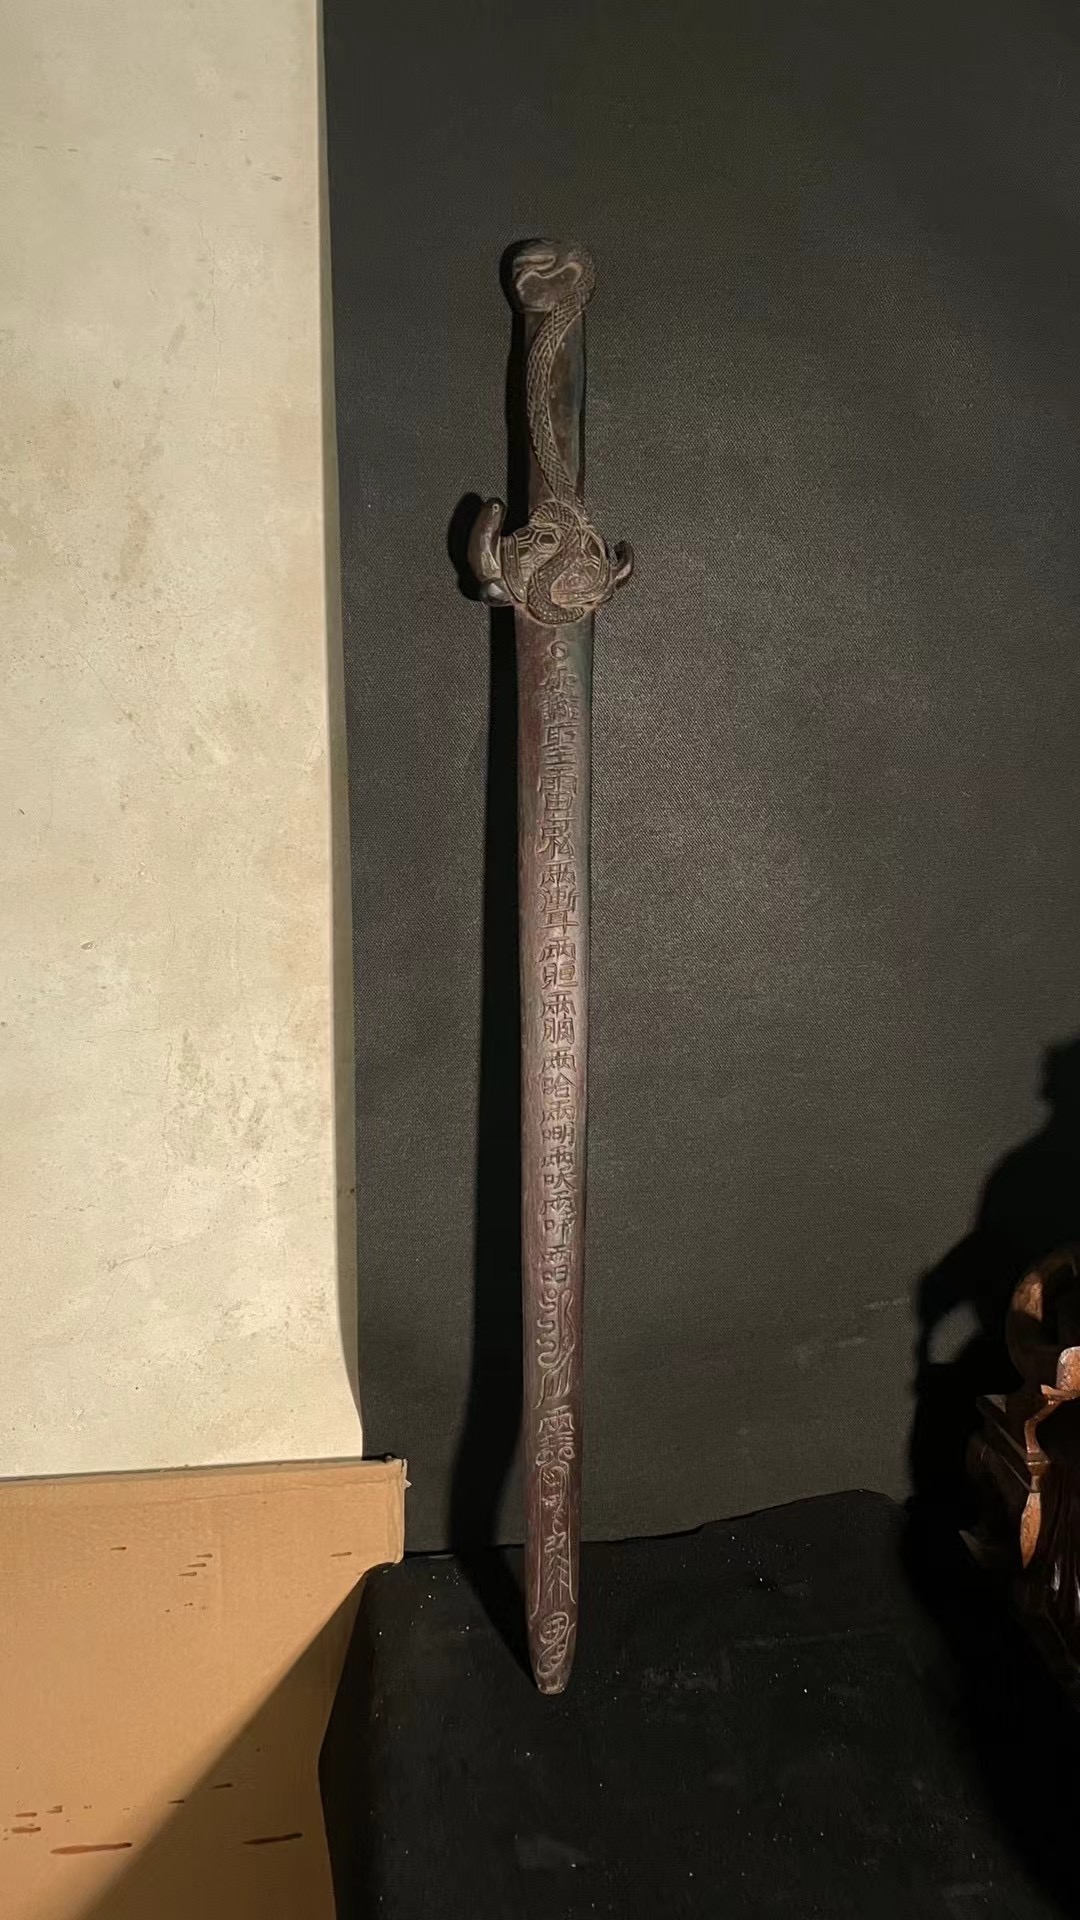
Crafting a Traditional Peach Wood Sword: A Step-by-Step Guide to Creating a Cultural Masterpiece
1. Material Selection
-
Wood Type: The preferred material is peach wood (Peach Wood Sword), known for its hardness, fine grain, and cultural significance in Chinese tradition as a protective charm against evil.
-
Wood Requirements:
-
Choose peach trees aged 10 years or older for denser wood.
-
Ensure the wood is free from pests, cracks, or rot.
-
Select wood with straight, even grain to ensure strength and aesthetics.
-
Harvesting Time: Typically, trees are cut in autumn or winter when the moisture content is lower, reducing the risk of warping during drying.
2. Wood Preparation
-
Initial Drying:
-
Cut the harvested peach wood into suitable lengths (slightly longer than the intended sword) and air-dry in a well-ventilated area.
-
Natural drying takes 6 months to 1 year, depending on local climate conditions.
-
For artificial drying (e.g., using a kiln), maintain temperatures between 40°C and 60°C to prevent cracking.
-
Cutting the Blank:
-
Based on the design, cut the dried wood into a rough blank for the sword.
-
The blade blank is typically rectangular, 5-8 cm wide and 1.5-2.5 cm thick.
-
The hilt is cut separately, 10-15 cm long, with dimensions adjusted for comfortable grip.
3. Blade Crafting
-
Rough Shaping:
-
Use saws and planes to shape the blank into the general form of a sword.
-
Taper the tip to create a sharp point.
-
Smooth the sides of the blade to ensure symmetry.
-
Fine Shaping:
-
Use wood files and sandpaper to refine the blade, creating a smooth surface.
-
Round the edges slightly for safety and aesthetics.
-
Use a plane or file to create a distinct ridge along the blade’s spine.
-
Carving and Decoration:
-
If desired, carve patterns, symbols, or text into the blade using carving knives or electric engravers.
-
Sand the carved areas gently to smooth any rough edges.
4. Hilt Crafting
-
Rough Shaping:
-
Cut the hilt wood into a shape suitable for gripping, typically cylindrical or slightly flattened.
-
The hilt is usually 10-15 cm long and 2.5-3.5 cm in diameter.
-
Fine Shaping:
-
Use files and sandpaper to smooth the hilt for a comfortable grip.
-
Optionally, carve decorative patterns or textures for better grip and aesthetics.
-
Decoration:
-
Wrap the hilt with thread, leather, or rope for improved grip and visual appeal.
-
Add metal fittings or gemstones at the ends for a more luxurious finish.
5. Assembly and Adjustment
-
Blade and Hilt Assembly:
-
Create a mortise-and-tenon joint or use high-strength wood glue to attach the hilt to the blade.
-
Balance Adjustment:
-
Check the sword’s balance; the center of gravity should be near the hilt for comfortable handling.
-
Adjust the weight distribution by modifying the blade or hilt if necessary.
6. Surface Finishing
-
Sanding:
-
Sand the entire sword with progressively finer grits of sandpaper (up to 800+ grit) for a smooth finish.
-
Coating:
-
Apply varnish or wood wax to protect the wood and enhance its appearance.
-
For varnish, apply 2-3 coats, sanding lightly between layers.
-
For wax, use a soft cloth to apply and polish after it soaks into the wood.
7. Quality Inspection
-
Visual Check:
-
Inspect for cracks, flaws, or uneven surfaces.
-
Ensure carvings are clear and decorations are securely attached.
-
Functional Test:
-
Hold the sword to check for comfort and balance.
-
Perform a gentle swing to ensure the blade is stable and free from rattling.
8. Packaging and Storage
-
Packaging:
-
Wrap the blade in soft cloth to prevent scratches.
-
Store the sword in a custom scabbard or wooden box lined with velvet.
-
Storage:
-
Keep in a dry, ventilated area away from direct sunlight and humidity.
-
Periodically inspect and reapply wax or varnish to maintain the finish.
Important Notes
-
Tool Safety:
-
Wear protective gloves and goggles when using saws, planes, or files.
-
Exercise caution when operating power tools.
-
Sustainability:
-
Source peach wood responsibly, avoiding endangered species.
-
Minimize waste by repurposing scraps for smaller projects.
-
Cultural Respect:
-
The peach wood sword (Peach Wood Sword) holds cultural significance in Chinese tradition. Respect its symbolic meaning and traditional design during crafting.
By following these detailed steps, you can create a peach wood sword (Peach Wood Sword) that is not only functional but also a work of art and cultural significance. Each step requires patience and precision to ensure a high-quality final product.